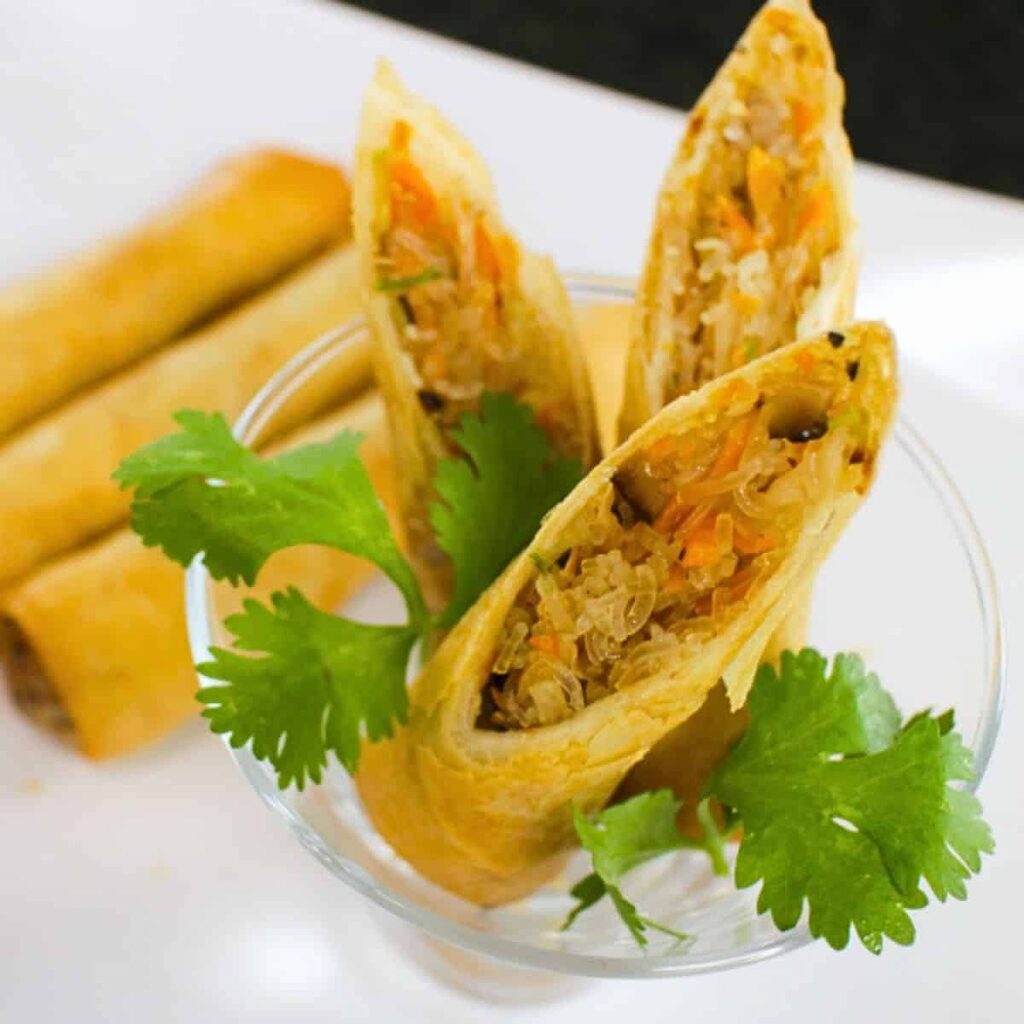
In the bustling world of appetizers, there’s one dish that effortlessly combines convenience and culinary delight — crispy fried spring rolls. Whether you’re hosting a gathering or craving a satisfying snack, these delightful bites offer a mouthwatering fusion of flavors and textures that will have your taste buds singing. From the captivating crunch of the wrapper to the savory filling, crispy fried spring rolls can be tailored to suit any palate, making them a go-to choice for busy individuals and families alike.
As an avid home cook, I’ve mastered the art of creating these irresistible treats, and I’m excited to share my tips and tricks with you. In this comprehensive guide, we’ll explore the key components of crafting the perfect crispy fried spring roll, from the flavorful fillings to the techniques for achieving that iconic crunch. Plus, I’ll reveal the secrets to making them ahead of time for ultimate convenience.
Crafting the Ideal Spring Roll Filling
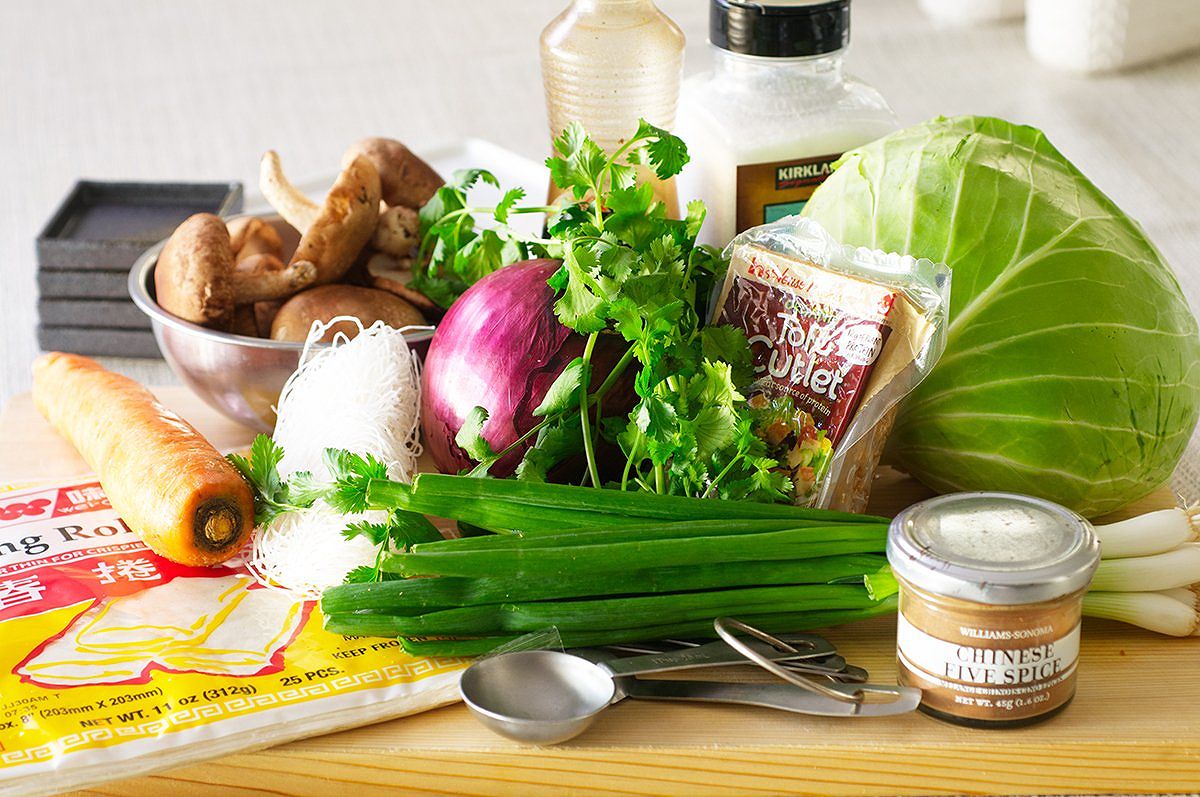
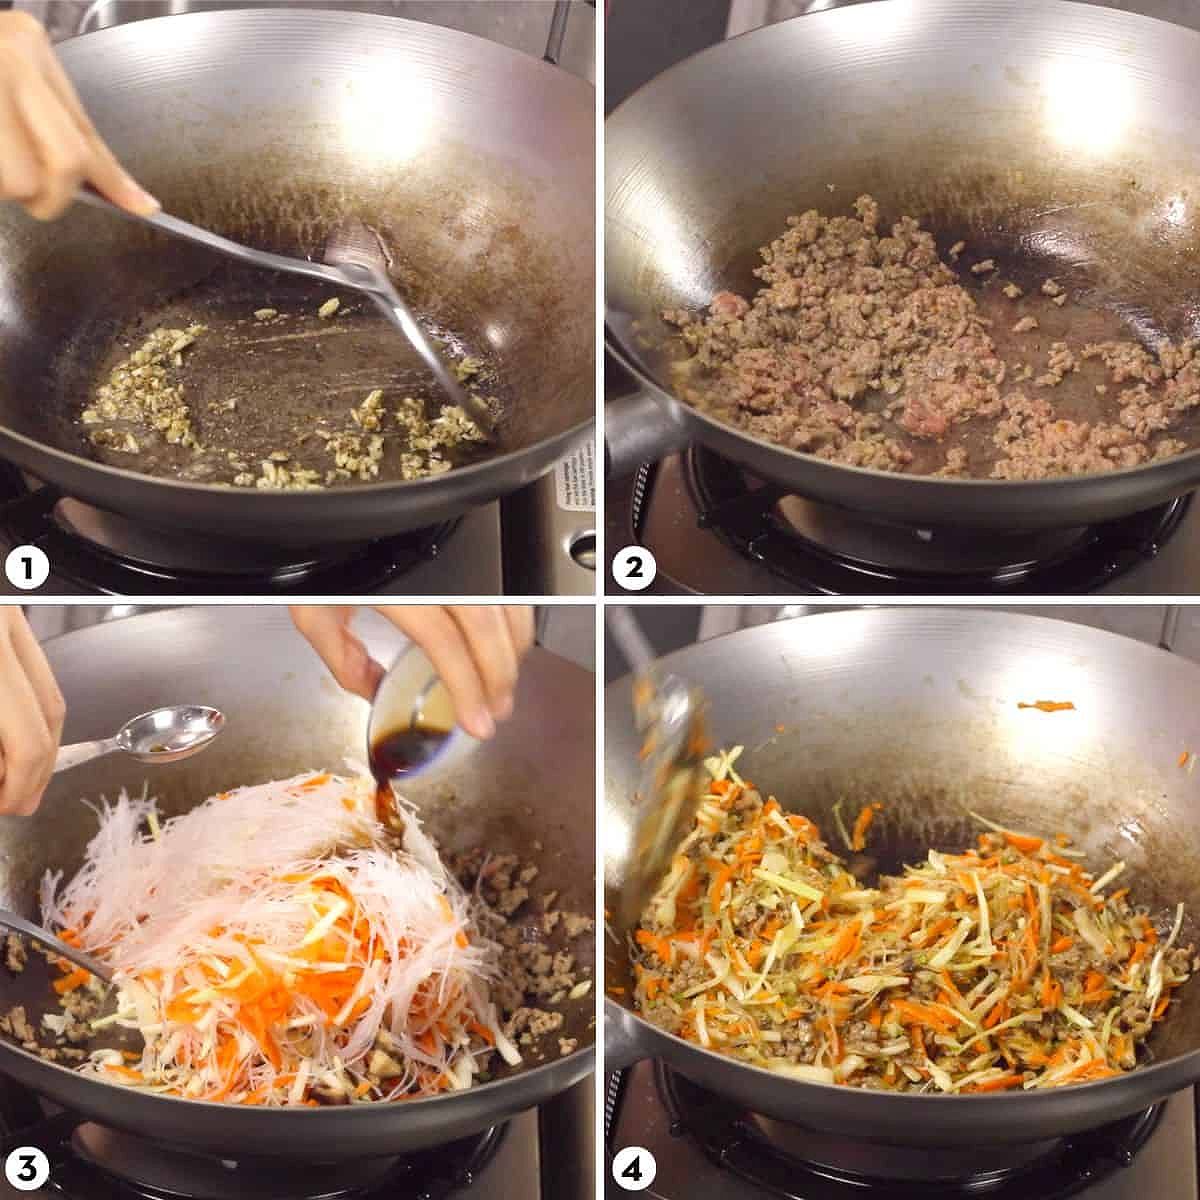
At the heart of a show-stopping crispy fried spring roll lies the filling, and I’ve got you covered. While the classic approach combines ground pork or chicken, shredded cabbage, carrots, and bean thread noodles, seasoned with a blend of soy sauce, salt, and pepper, there’s so much room for creativity.
For the adventurous palate, a veggie-packed filling featuring marinated tofu, mushrooms, and a vibrant array of vegetables, complemented by aromatic sauces like hoisin or peanut, can be a delightful alternative. By using extra-firm tofu as the protein source, you can create a delicious and satisfying filling that caters to vegetarian and vegan diners.
When it comes to the classic filling, the beauty lies in its versatility. You can adjust the proportions of each ingredient to suit your personal preferences, and even incorporate additional vegetables like onions, celery, or shiitake mushrooms to enhance the overall flavor profile. For instance, using ground chicken thighs instead of pork can introduce a different flavor and texture, while a splash of sesame oil can elevate the dish, providing a nutty aroma that complements the filling perfectly.
Mastering the Art of Spring Roll Wrapping
The key to creating perfectly crispy fried spring rolls lies in the wrapping technique, and it’s a skill that’s easy to master with a little practice. Start by ensuring your spring roll wrappers are properly thawed and ready to use, then gently peel them apart, taking care not to tear the delicate sheets.
To assemble your spring rolls, simply lay a wrapper with a corner facing you, place a heaping tablespoon of your desired filling in the center, and then fold the bottom corner over the filling. Tuck in the sides and continue rolling until you reach the top corner, sealing the edge with a dab of water to ensure a secure closure.
One common mistake to avoid is overfilling the wrappers, as this can lead to tearing or bursting during frying. Aim for about 2-3 tablespoons of filling per roll to achieve the perfect balance. And remember, a little water on the edges of the wrapper can help create a strong seal, preventing any leaks during cooking.
Frying Crispy Fried Spring Rolls to Perfection
Now, the moment of truth — achieving that iconic crispy texture. While deep frying remains the traditional method, offering the most indulgent crunch, there are alternative options to consider, each with their own advantages.
For the ultimate crispy experience, deep frying is the way to go. Ensure you have enough oil (at least 2 inches deep) in your pot or pan, and maintain the temperature between 350°F to 375°F. Gently lower the spring rolls into the hot oil and fry until they’re a beautiful golden brown, about 2-3 minutes per side. Drain the fried rolls on paper towels to remove any excess oil.
If you’re looking for a lighter approach, air frying can be a game-changer. Generously spray your air fryer basket with oil, arrange the spring rolls in a single layer, and air fry at 375°F for 12-15 minutes, flipping halfway through. This method delivers a satisfying crunch with a fraction of the oil.
For a quick and easy option, pan-frying is also a viable choice. Heat a few tablespoons of oil in a skillet over medium-high heat, and gently place the spring rolls in the pan. Fry for 2-3 minutes per side, or until they achieve a golden-brown hue. This method requires less oil than deep frying and can still produce deliciously crispy results.
The Convenience of Make-Ahead Spring Rolls
One of the best things about crispy fried spring rolls is their make-ahead versatility. You can prepare them in advance and freeze them for later use, ensuring you always have a delicious appetizer on hand for unexpected guests or busy weeknights.
To freeze uncooked spring rolls, simply assemble them, arrange them in a single layer on a baking sheet, and then transfer them to an airtight container or resealable bag once frozen. When ready to serve, you can fry the frozen rolls without thawing, adding an extra 2-3 minutes to the cooking time.
Alternatively, you can freeze the spring rolls after they’ve been fried. Allow them to cool completely, then arrange them in a single layer on a baking sheet and freeze. Once frozen, transfer them to an airtight container or bag and store for up to 2 months. To reheat, simply place the frozen spring rolls in a 350°F oven for 10-15 minutes, or until they’re hot and crispy.
Having a stash of uncooked or pre-fried spring rolls in the freezer means you can whip up a crowd-pleasing appetizer in no time, making them the perfect solution for any last-minute gathering or sudden cravings.
Serving Suggestions and Dipping Sauces
Crispy fried spring rolls are a versatile appetizer that pair well with a variety of dipping sauces and complementary dishes. Tantalize your taste buds with a sweet chili sauce, a zesty peanut dip, or a classic soy sauce. For a complete meal, serve these delightful bites alongside steaming rice, aromatic noodle dishes, or refreshing Asian-inspired salads.
The beauty of crispy fried spring rolls lies in their ability to be the star of the show or a supporting player, enhancing the overall dining experience with their delicious flavors and satisfying crunch.
Elevating Your Cooking Game
As an experienced home cook, I understand the importance of not only creating delicious dishes but also finding ways to make the cooking process more efficient and enjoyable. That’s why I’m excited to share some of my top tips for elevating your crispy fried spring roll game.
Batch Cooking for Convenience
One of the best ways to save time and effort is to embrace the power of batch cooking. When you have a free afternoon or evening, set aside some time to assemble a larger batch of spring rolls. This not only allows you to have a stockpile of ready-to-fry rolls on hand but also makes the process more efficient, as you can tackle the wrapping and frying in one seamless session.
Mastering the Freezer-Friendly Technique
As mentioned earlier, the ability to freeze both uncooked and cooked spring rolls is a game-changer. By taking advantage of this make-ahead strategy, you can have a steady supply of these delectable appetizers on hand, ready to be fried or reheated at a moment’s notice. This is particularly useful for busy weeknights or unexpected guests, as you can simply pull a batch from the freezer and have a crowd-pleasing dish ready in no time.
Experimenting with Flavor Variations
While the classic fillings are always a hit, don’t be afraid to get creative and experiment with different flavor profiles. Try swapping out the protein for shrimp or combining a mix of vegetables for a vegetarian option. You can also incorporate unique seasonings, herbs, or spices to put your own personal spin on the recipe. Engaging in a little culinary exploration can breathe new life into your spring roll repertoire and keep your taste buds guessing.
Leveraging Time-Saving Tools
To make the preparation process even easier, consider investing in a few kitchen tools that can streamline your spring roll assembly. A mandoline slicer, for instance, can quickly julienne vegetables, ensuring your fillings are evenly cut and consistent. A small cookie scoop can also be a game-changer, helping you portion out the filling quickly and efficiently.
By embracing these tips and techniques, you’ll not only elevate the flavor and presentation of your crispy fried spring rolls but also make the cooking process itself more enjoyable and hassle-free. Get ready to impress your family and friends with your newfound mastery of this versatile and delicious appetizer.
FAQ
Q: What’s the difference between spring roll wrappers and egg roll wrappers?
A: Spring roll wrappers are thinner and more delicate, while egg roll wrappers are thicker and sturdier.
Q: Can I bake spring rolls instead of frying them?
A: Yes, you can bake spring rolls, but they may not achieve the same level of crispiness as their fried counterparts.
Q: How long can I keep fried spring rolls in the refrigerator?
A: Fried spring rolls can be stored in the refrigerator for up to 3 days.
Conclusion
Crispy fried spring rolls are the ultimate crowd-pleasing appetizer, offering a delightful balance of flavors and textures that will captivate your taste buds. Whether you opt for the classic pork or chicken filling or experiment with a veggie-packed version, these versatile bites are sure to impress your guests and satisfy your cravings.
With the added convenience of make-ahead preparation and freezing, you can enjoy the perfect crispy spring roll anytime, anywhere. From a casual snack to a sophisticated appetizer, crispy fried spring rolls are a culinary delight that everyone can enjoy. So, why not try your hand at creating these irresistible bites and elevate your next gathering or weeknight meal to new heights?
